M5Cloud Quick Start (MicroPython)
Info
If it's first time to use M5Core or you want to change the networkable AP that means the Core can't access http://cloud.m5stack.com, you need visit this article for setting wifi How to connect wifi using Core with M5Cloud.
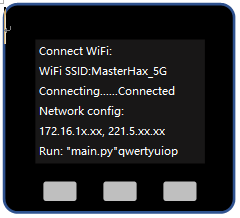
By default, we consider your M5Core has been connected with the networkable AP successfully. And the screen shows like this figure below.
1. Connect to M5Cloud
Now If you want to program the M5 from your computer, enter the url shown at the top of the screen cloud.m5stack.com
It will show as following figure.
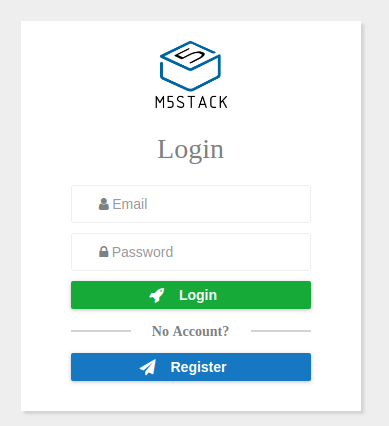
Now, register a account.
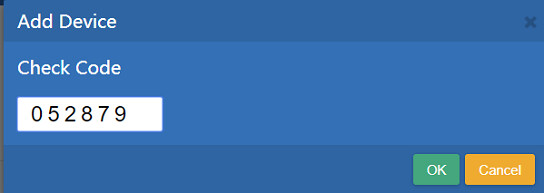
2. Binding device
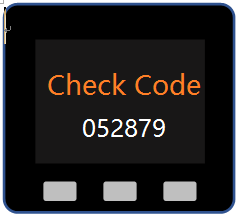
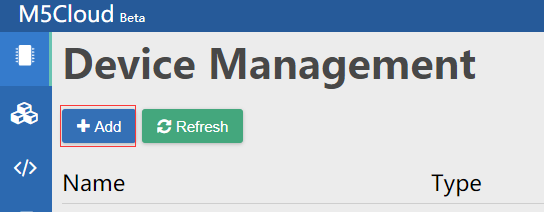
Press Device->Add buttom on M5Cloud IDE for binding M5Stack board to your account.(Now, my check code is 052879)
At the moment, you can program it through Python as shown below.
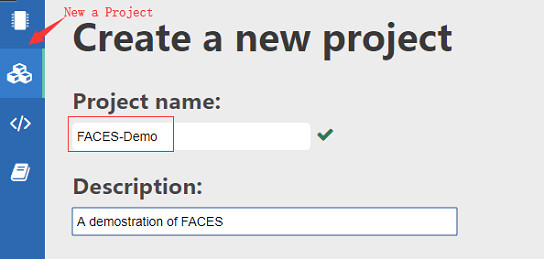
3. Program with Core
a. New a Project
a. Code it
Now, let's get started with FACES Kit.
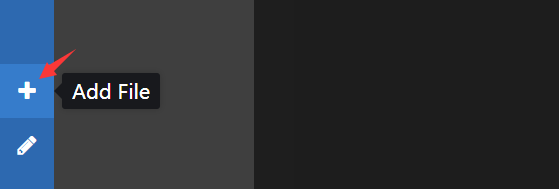
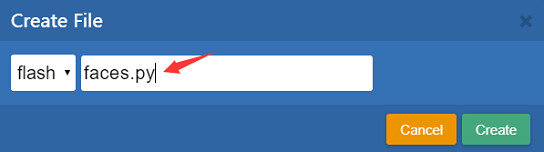
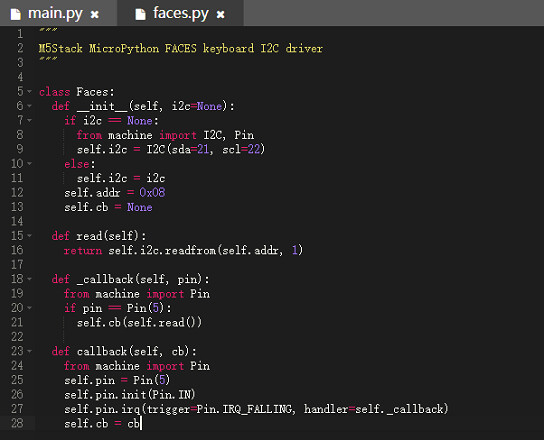
After creating a new project, add a file named faces.py as a python module.
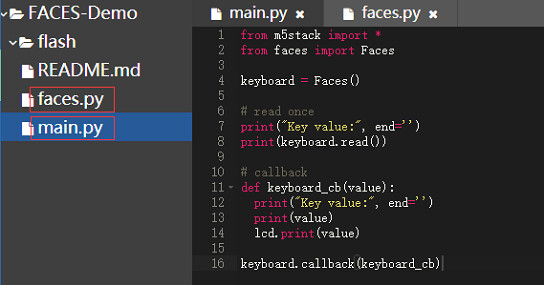
Then copy following code into faces.py and main.py, and save they.
1 2 3 4 5 6 7 8 9 10 11 12 13 14 15 16 17 18 19 20 21 22 23 24 25 26 27 28 29 30 | """ File name: faces.py M5Stack MicroPython FACES keyboard I2C driver """ class Faces: def __init__(self, i2c=None): if i2c == None: from machine import I2C, Pin self.i2c = I2C(sda=21, scl=22) else: self.i2c = i2c self.addr = 0x08 self.cb = None def read(self): return self.i2c.readfrom(self.addr, 1) def _callback(self, pin): from machine import Pin if pin == Pin(5): self.cb(self.read()) def callback(self, cb): from machine import Pin self.pin = Pin(5) self.pin.init(Pin.IN) self.pin.irq(trigger=Pin.IRQ_FALLING, handler=self._callback) self.cb = cb |
1 2 3 4 5 6 7 8 9 10 11 12 13 14 15 16 17 18 19 20 | """ File name: main.py """ from m5stack import * from faces import Faces keyboard = Faces() # read once print("Key value:", end='') print(keyboard.read()) # callback def keyboard_cb(value): print("Key value:", end='') print(value) lcd.print(value) keyboard.callback(keyboard_cb) |

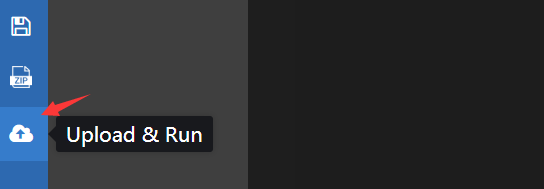
Now, upload and run it!
Complete
The function of This demostration is that screen and serial terminal will display the value of the key you pressed.
Now, I press the first line of QWERTY Keyboard. ("q", "w", "e", "r", "t", "y", "u", "i", "o", "p")