Programming the ESP32
After a successful installation of the Arduino IDE it's necessary to install the ESP32 as development board inside the Arduino IDE. For this you have to do the following two steps:
- Register a new board manager
- Install the extension for ESP32
Note
The communication between the host computer and the development board is done by USB. The used USB chipset is a Silicon Labs CP210x. It should be automatically recognized by the operation system. If there is no automatic recognition install the driver manually. The link to the driver page is here
Register a new board manager
Start the Arduino IDE, open the Preferences window with File > Preferences in the menu bar.
| IDE | preferences |
|---|---|
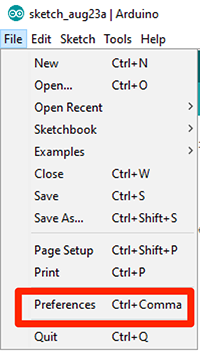 |
select preferences |
The Preferences window has two tabs:
- Settings
- Network
| IDE | Settings |
|---|---|
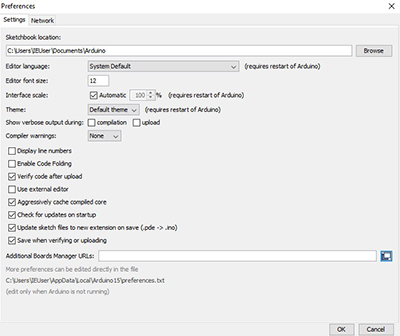 |
select Additional Boards Manager URLs |
It's not necessary to change the settings inside the Network tab. But a change in the tab Settings is necessary. Add an entry to the Additional Boards Manager URLs:

You could directly paste the following url into the input field or open a separate window:
1 | https://dl.espressif.com/dl/package_esp32_index.json |
| IDE | Enter additional URLs |
|---|---|
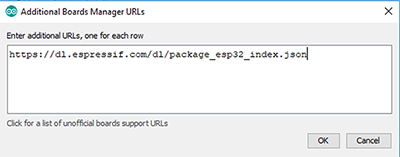 |
insert url |
Install the extension for ESP32
Now you can install the development extension for the ESP32 at the Arduino IDE. Go to Tools > Board > Boards Manager...
| IDE | Boards Manager |
|---|---|
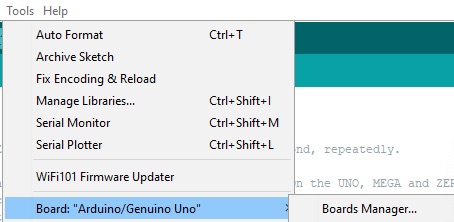 |
select Boards Manager |
Use the search input file. Search for esp32 and select Install.
| IDE | Boards |
|---|---|
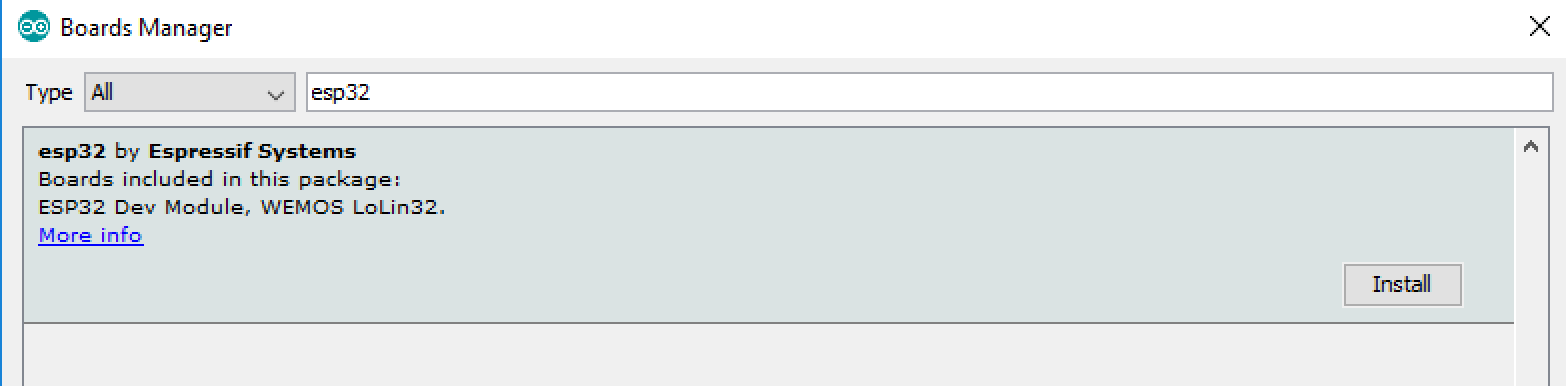 |
select install |
After the install a section ESP 32 in the menu Tools > Board should occur.
| IDE | Boards |
|---|---|
 |
select Boards |
Now select the ESP32 Dev Module in Tools -> Board.
| IDE | ESP32 Dev Module |
|---|---|
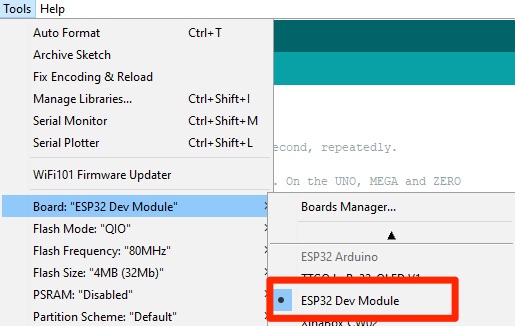 |
select ESP32 Dev Module |