UIFlow Quick Start (Blockly/MicroPython)
1. Install USB to Serial Driver
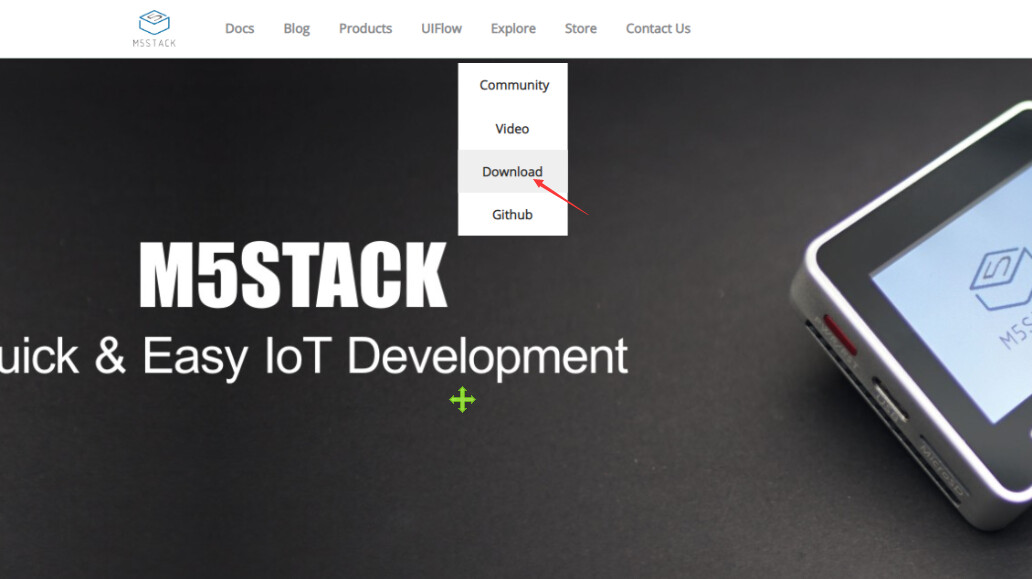
Open your browser, enter the official website of M5Stack https://m5stack.com/download
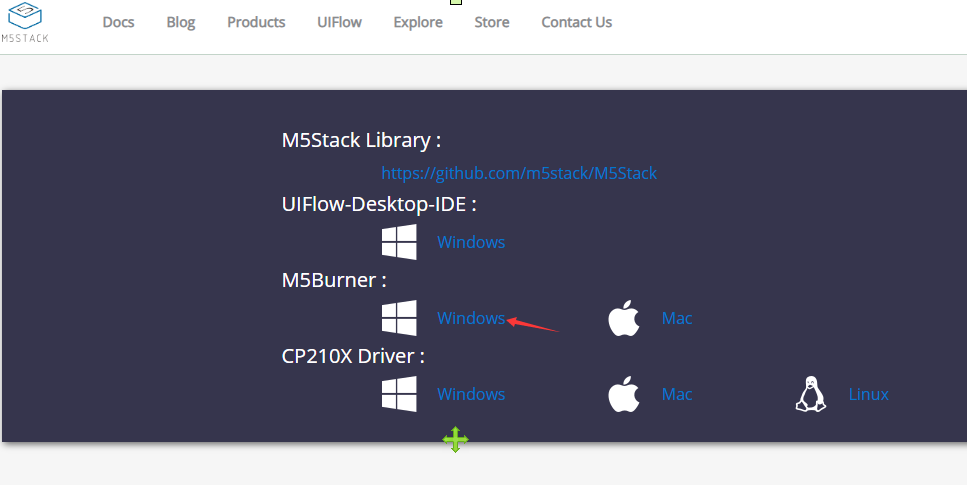
(1) click Windows for downloading this installation package and then unzip this package.
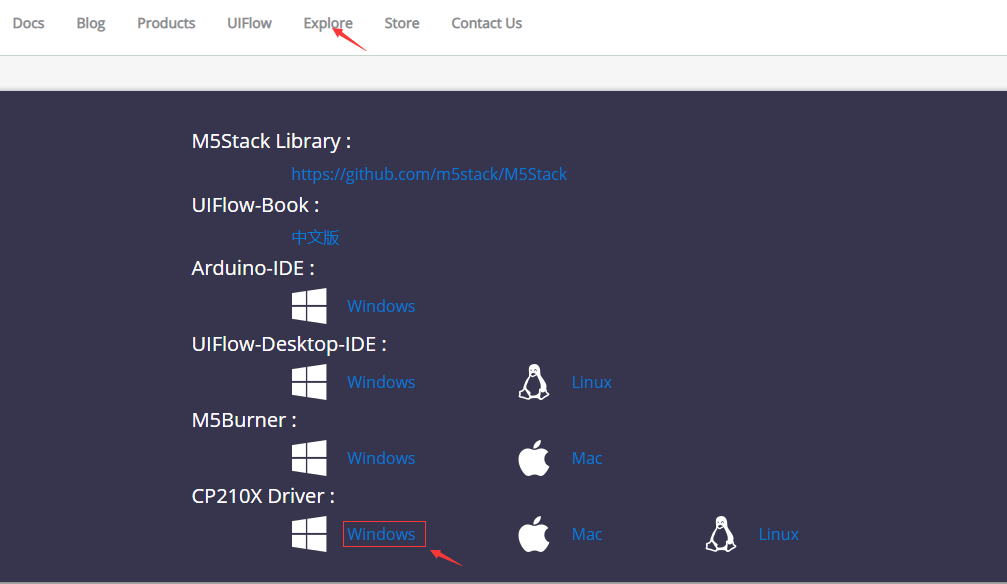
(2) According to your Windows operating system type, select the corresponding driver installation package
-
32-bit Windows operating system, choose
CP210xVCPInstaller_x86_vx.x.x.x.exe -
64-bit Windows operating system, choose
CP210xVCPInstaller_x64_vx.x.x.x.exe
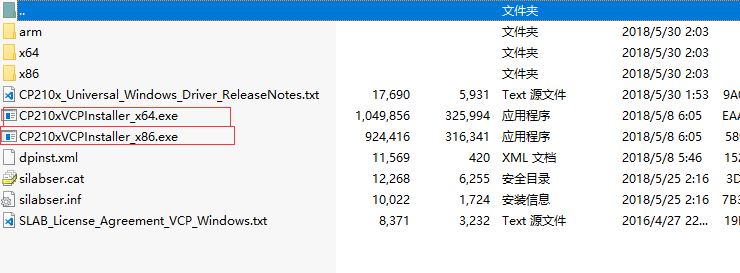
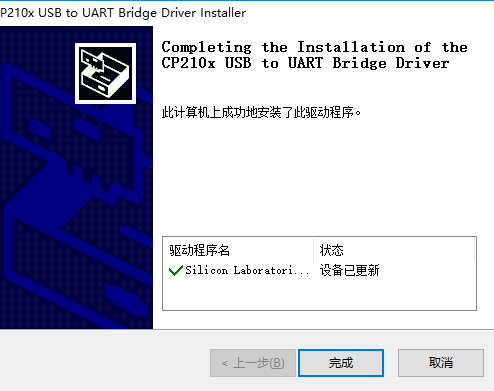
(3) double click the executable file for installing.

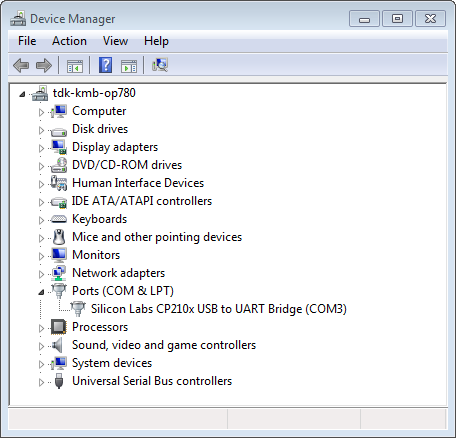
(4) Check the serial port number COMx
To comfirm if the USB to Serial Driver was successfully installed already, Check the list of identified COM ports in the Windows Device Manager:
Connect the Core to the computer via a USB Type-C cable, open Windows Device Manager, click Ports(COM & LPT) for checking the list of identified COM ports.
Disconnect M5Core device and connect it back, to verify which port disappears from the list and then shows back again.
2. Burn UIFlow Firmware
(1) Download M5Burner
Access M5Stack Official Website, and download M5Burner
(2) Burn the firmware
Connect M5Core to the computer via the USB Type-C cable, unzip the M5Burner archive you just downloaded, and double-click the executable M5Burner.exe
Select the serial number and 921600 baud rate that the board is connected to the computer, and select the latest version of UIFlow firmware.
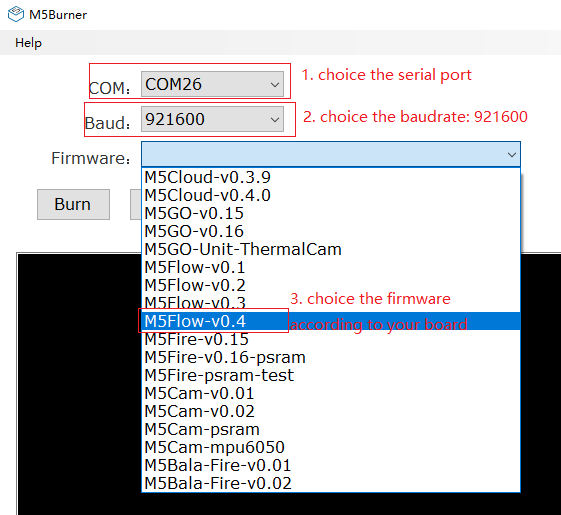
Click Burn for downloading UIFlow firmware
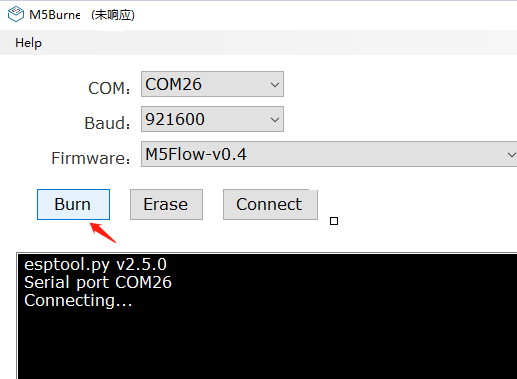
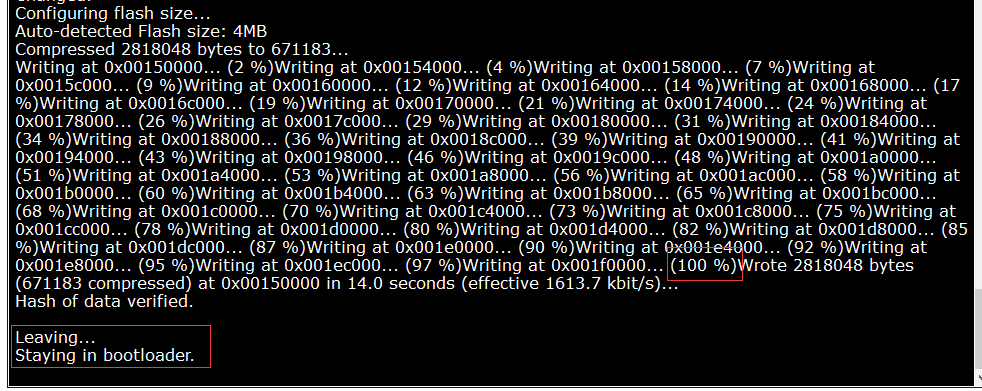
The following interface appears, indicating that the firmware is successfully burned.
3. Wi-Fi Setting
(1) Select SETUP
After successfully burning the UIFlow firmware, click the red button in the upper left corner of the Core to restart the device. Once the Core is powered on, immediately click the C button that indicates you select the SETUP option on the screen for the network configuration. Then click on the middle button and select Link Server: Flow.m5stack.com.
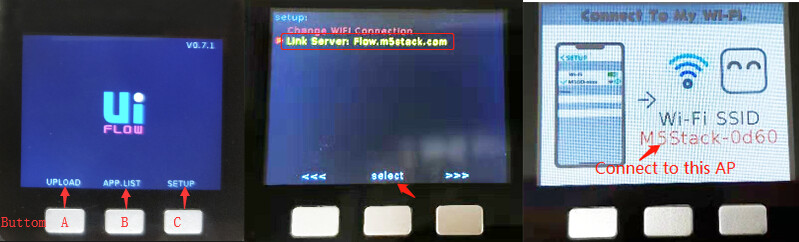
(2) Connect to AP
Turn on Wi-Fi on your phone or computer, then connect to the M5Core hotspot AP displayed on the screen ( For example, the M5Stack-0d60 is now displayed ). After the connection is successful, open a browser and enter the URL 192.168.4.1, then select Wi-Fi that can be connected to the network, enter the Wi-Fi password. ( Now, the networkable Wi-Fi is M5 )
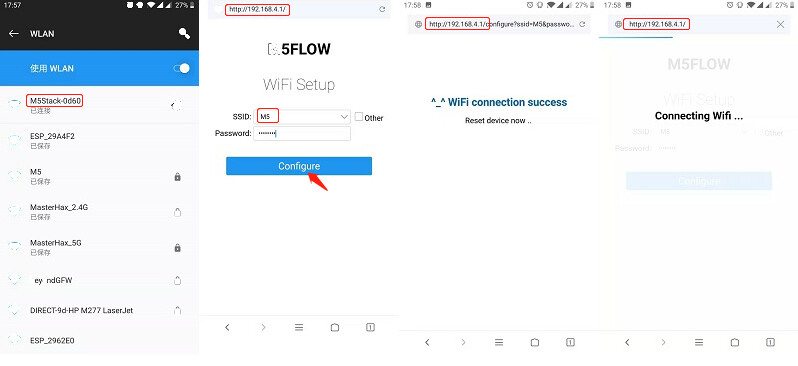
(3) Connect to Wi-Fi
After M5Core successfully connects to a networkable Wi-Fi (here M5), the screen will display APIKEY and the QR code that can access the UIFlow webpage.
Description of APIKEY: APIKEY is the device unique identifier. As long as the current UIFlow is connected to which device's APIKEY, The programming code will be downloaded to that device.
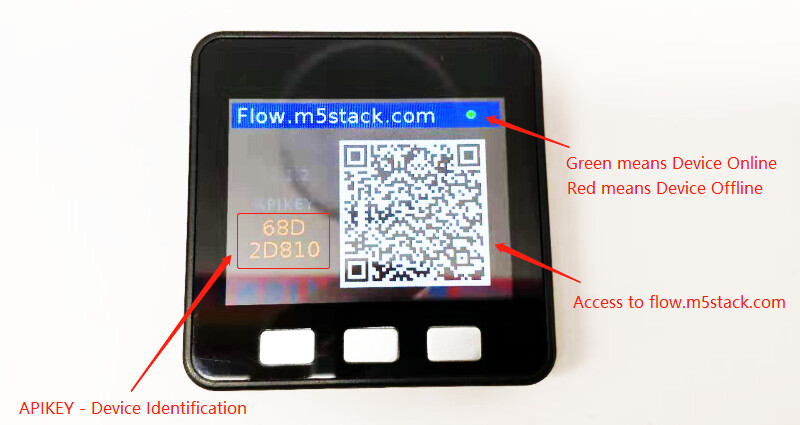
The status of the small dot on the screen:
-
Green means M5Core successfully connected to M5Stack Server, that is online status
-
Red means be offline status
4. Program
(1) Connect to UIFlow
Now scan the QR code on the M5Core with your phone or tablet, or if you are programming with a computer, enter the URL flow.m5stack.com on your computer's browser
Every time before you upload the code to M5Core through UIFlow, make sure that UIFlow is connected to the M5Core you want to program.
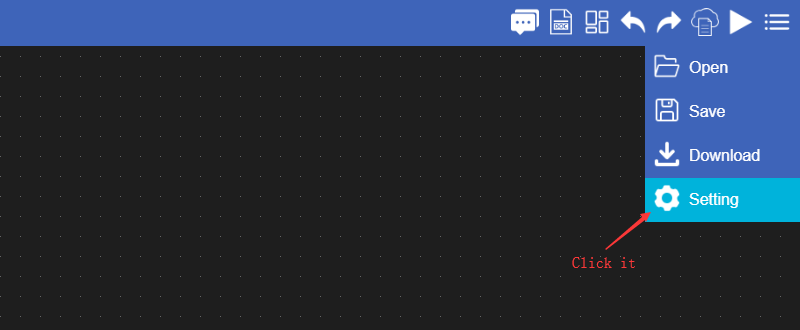
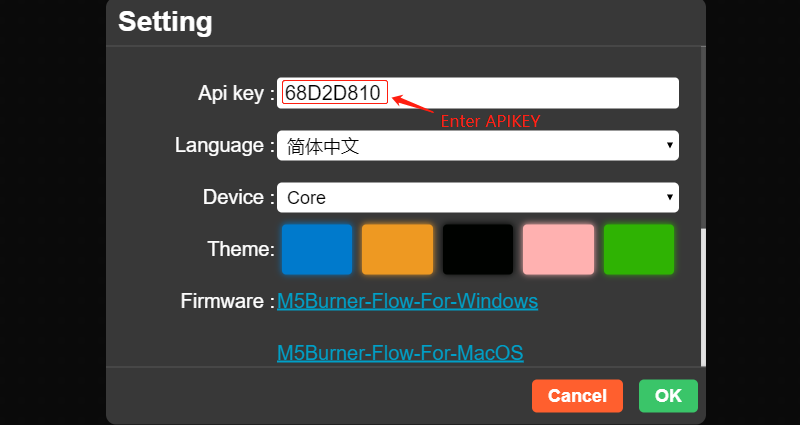
So you need to click on the gear in the upper right corner of the UIFlow IDE page and enter APIKEY on your M5Core screen in the pop-up dialog box. Click Save, then UIFlow will connect to M5Core.
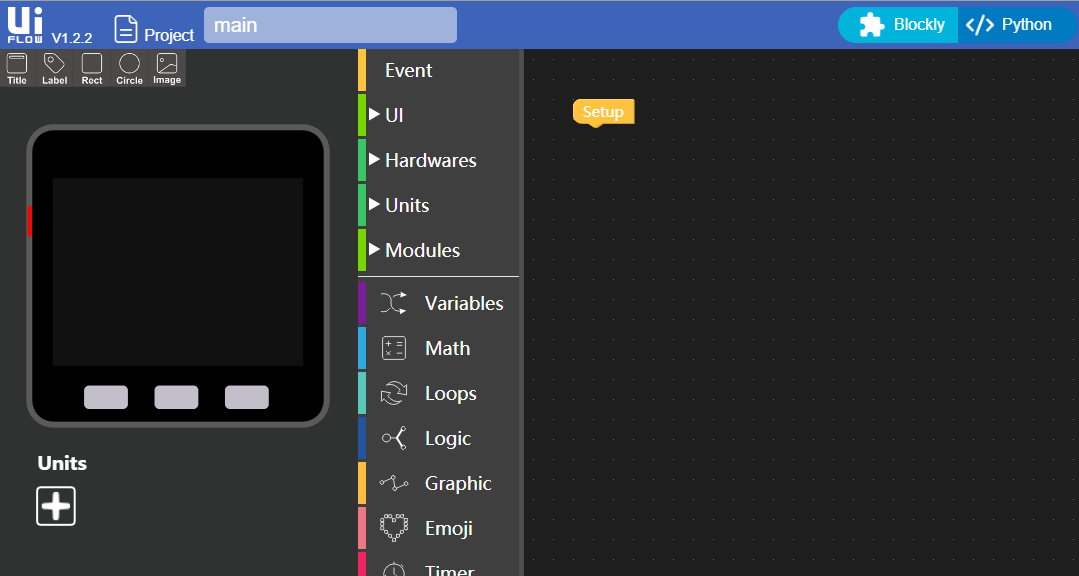
Now you can start programming with UIFlow!
(2) Programming example
a. draw a UI
Drag and drop the 4 controls in the upper left corner of the UIFlow IDE to the UI interface of M5Stack Core and click the Run button in the upper right corner of the page to execute the effect.
b. writing a Blockly program
Drag the Set emoji map in0 block from the Emoji category on the left to the code area of Blockly and click the Run button.
The link of source coce: https://github.com/m5stack/M5-ProductExampleCodes/blob/master/Core/M5_draw_heart.m5f
c. writing a MicroPython program
Copy the following code into the Python editing area, then click Run in the top right corner to execute the code.
1 2 3 4 5 6 7 8 9 10 11 | from m5stack import * from m5ui import * clear_bg(0x111111) btnA = M5Button(name='ButtonA', text='ButtonA', visibility=False) btnB = M5Button(name='ButtonB', text='ButtonB', visibility=False) btnC = M5Button(name='ButtonC', text='ButtonC', visibility=False) lcd.print("Hello M5Stack") |
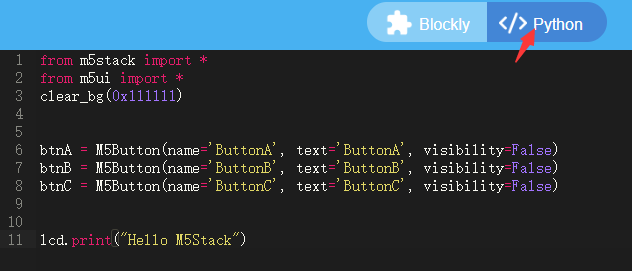
At this time, the word 'Hello M5Stack` will be printed on the M5Core screen.
Video Tutorial
UIFlow Overview
UIFlow Tutorial