How to Burn Firmware
This article will guide you how to burn a right firmware to your board via M5Burner.
Windows
1. Install USB driver
If you have not installed the CP2104 USB driver yet, read here. Otherwise, Start directly from step 2.
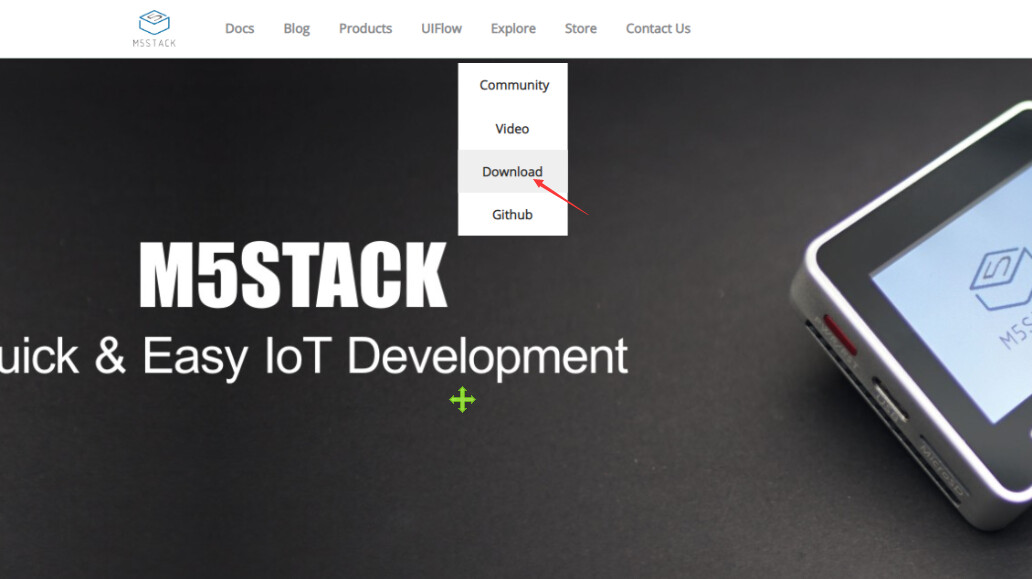
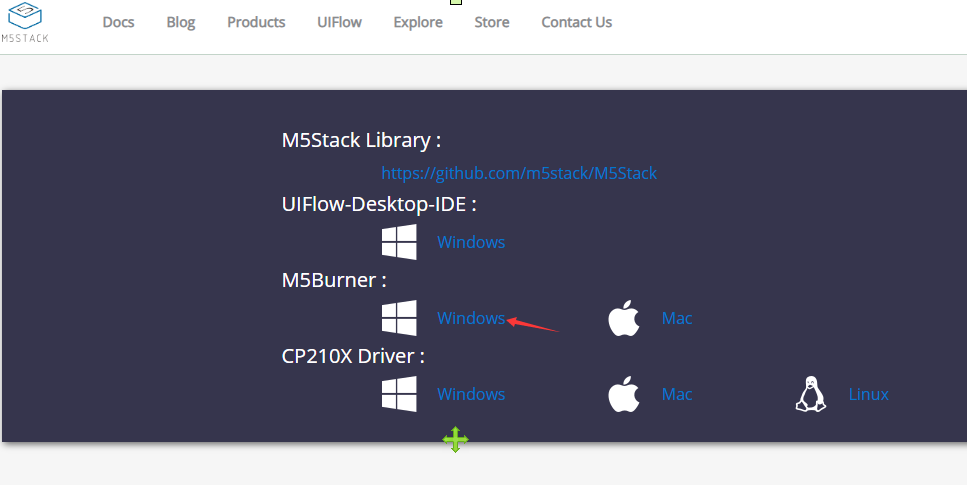
2. Download M5Burner
For downloading M5Burner, visit the M5Stack Website please.
3. Burn the firmware
Unzip the M5Burner tool which you donwloaded for official website just now, then double click M5Burner.exe.
Then choice the serial port which is connected with your board and the Baud which is 921600 following below steps. Choice a right firmware, click Erase and then click Burn.
-
If you want to program with UIFlow(/M5Cloud), select
M5Flow-vx.x(/M5Cloud-vx.x.x) option(the lastest version). -
If you own a ESP32CAM (/ M5CAMERA), select
M5Cam-vx.x (/M5Cam-psram)option
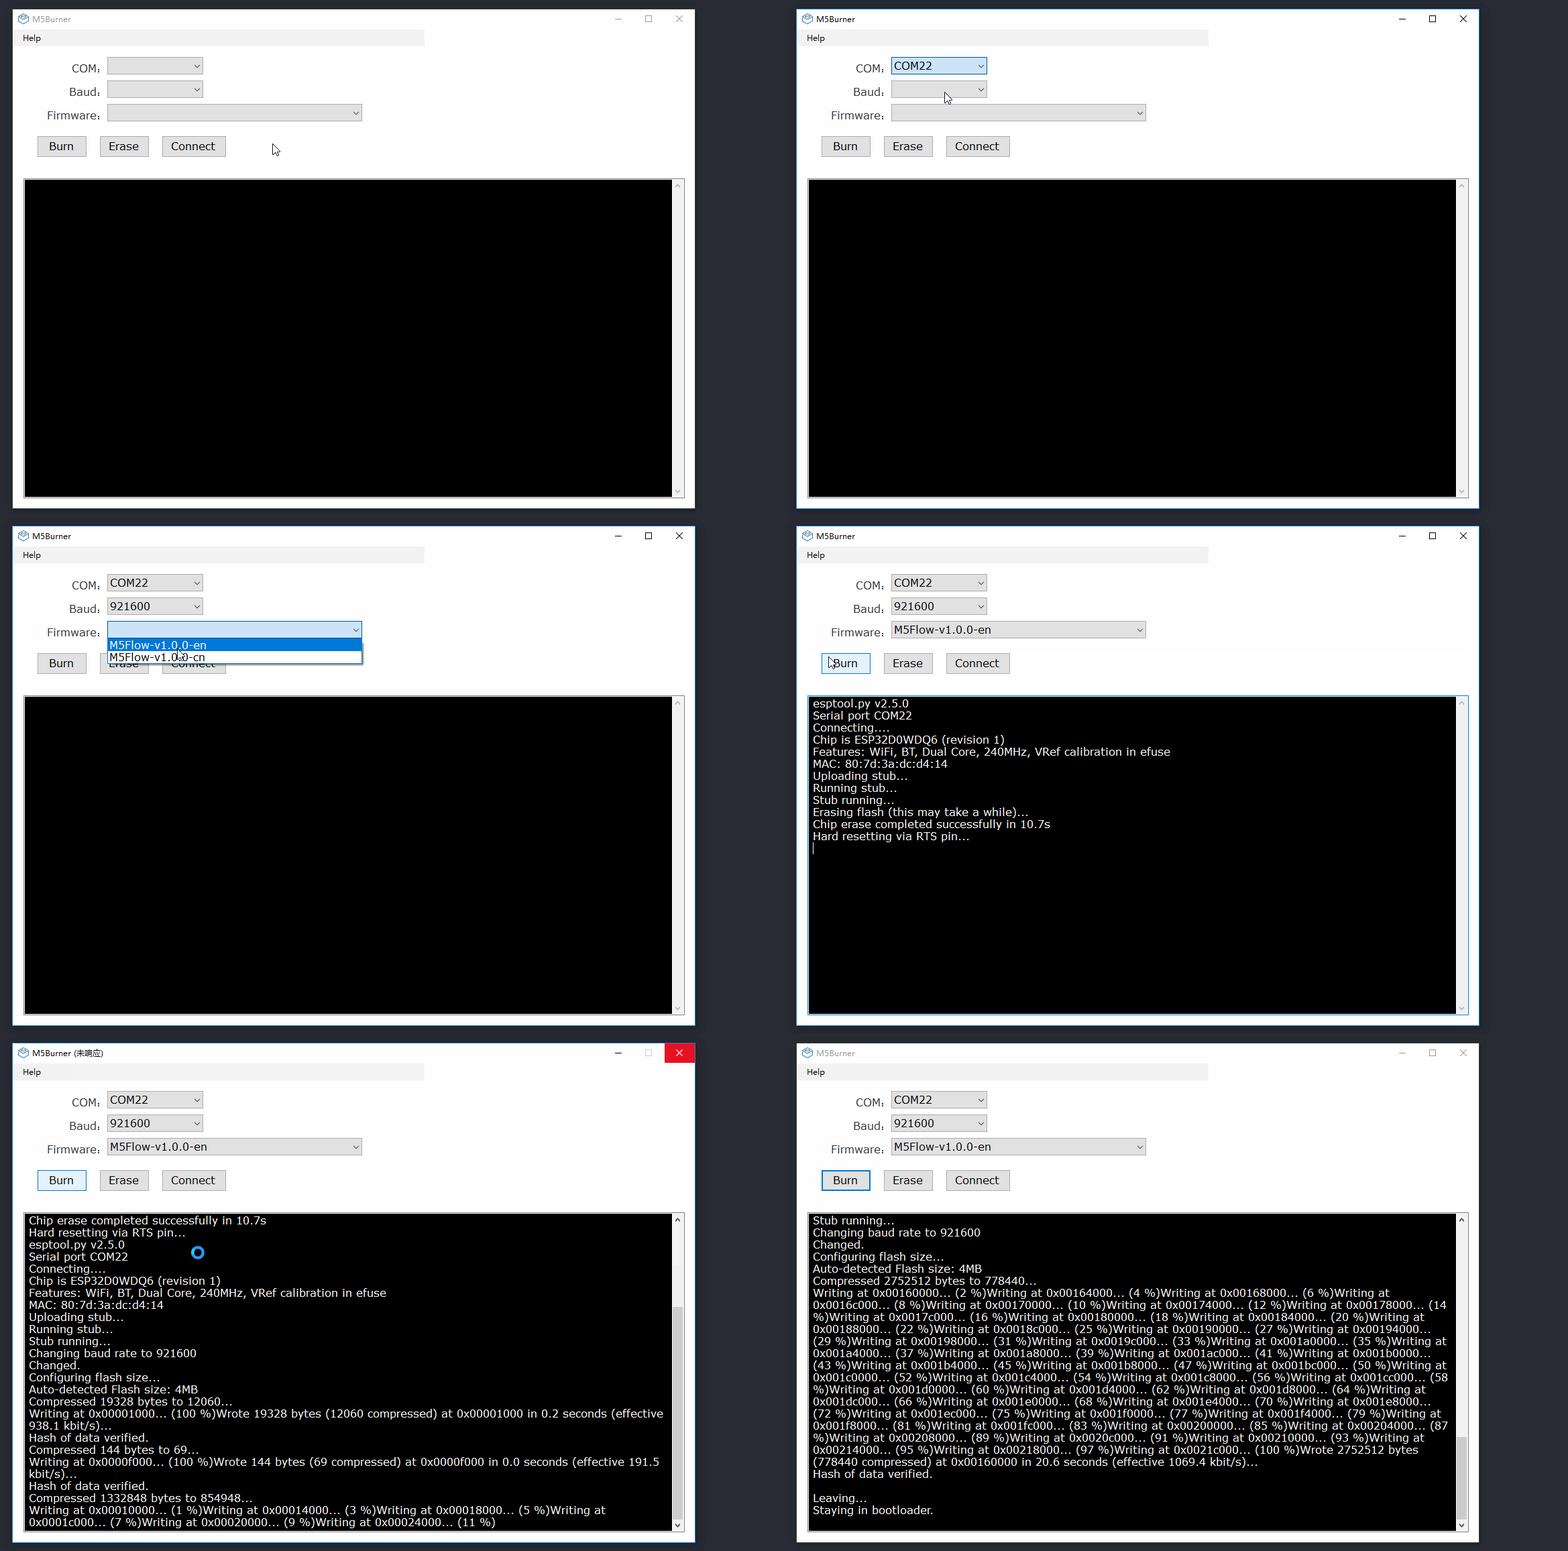
!> Notice If it does not display any COMx port or only COM1 exists at the option, you need to visit this article establish serial connection and reinstall the USB driver.
a. Choice a right firmware
a. select M5Flow-vx.x option(the lastest version), if you want to program with UIFlow
b. select M5Cam-vx.x (/M5Cam-psram) option, if you own a ESP32CAM (/ M5CAMERA)
b. Click Erase
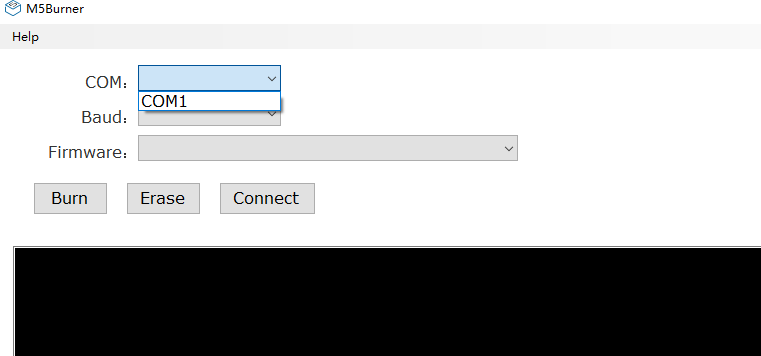
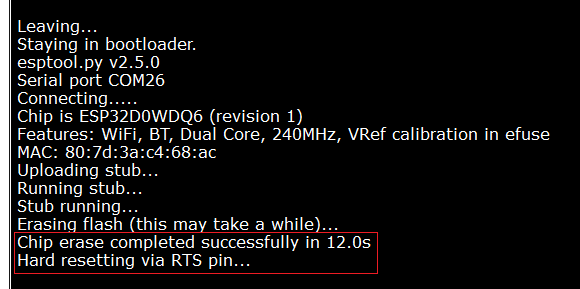
If M5Burner shows the information Hard resetting via RTS pin... below, it means chip has been erased successfully.
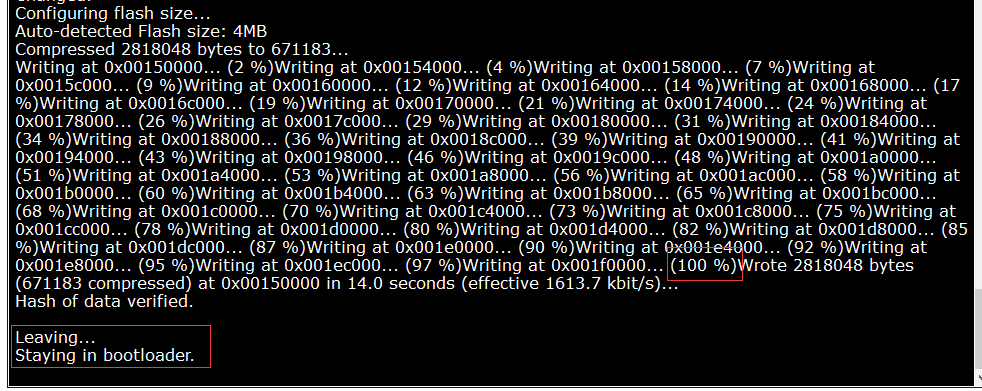
If M5Burner shows the information Leaving... Staying in bootloader. below, it means chip has been burnt successfully.
3. Then reset your board
Info
If M5Burner means be busy after clicking Burn, please wait for a few minutes. It'll be normal after the firmware has been burnt successfully.
Info
If the burning procedure has been interrupted(like M5Burner has been closed suddenly...), it's better to burn your board again.
MacOS
1. Install USB Driver (If you have not install USB driver, follow this step. Otherwise, jump to step 2 directly.)
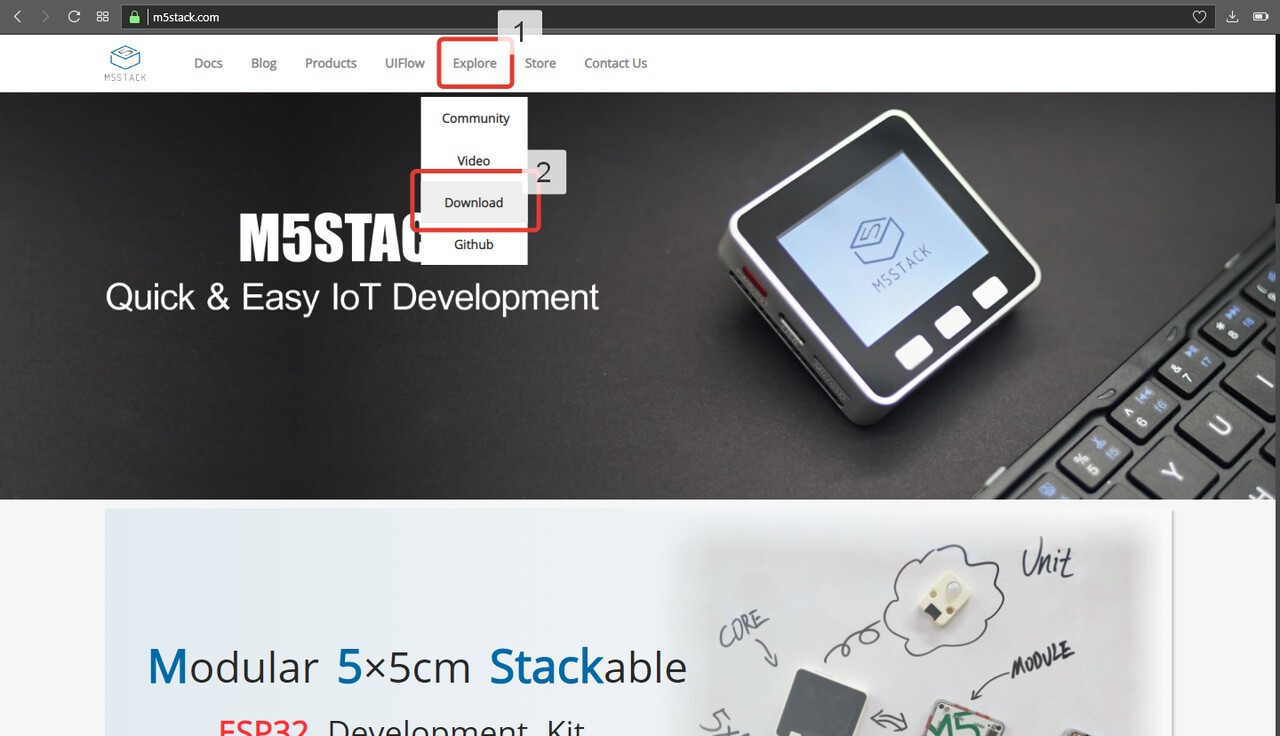
The first thing to do is to visit the official website https://m5stack.com, then select Explore -> Download from the top menu, download the M5Burner and the CP21X Driver.
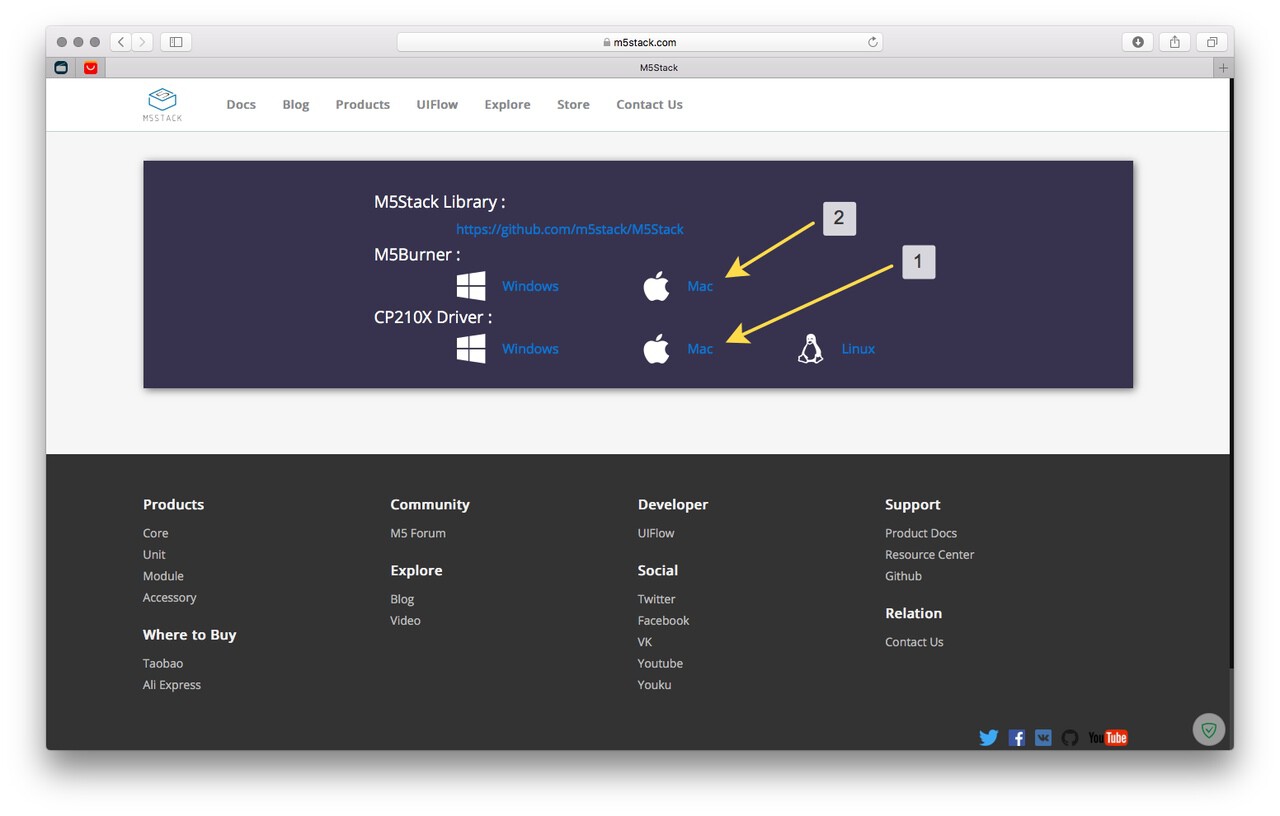
Once the driver download is complete. Open the driver file as shown below.
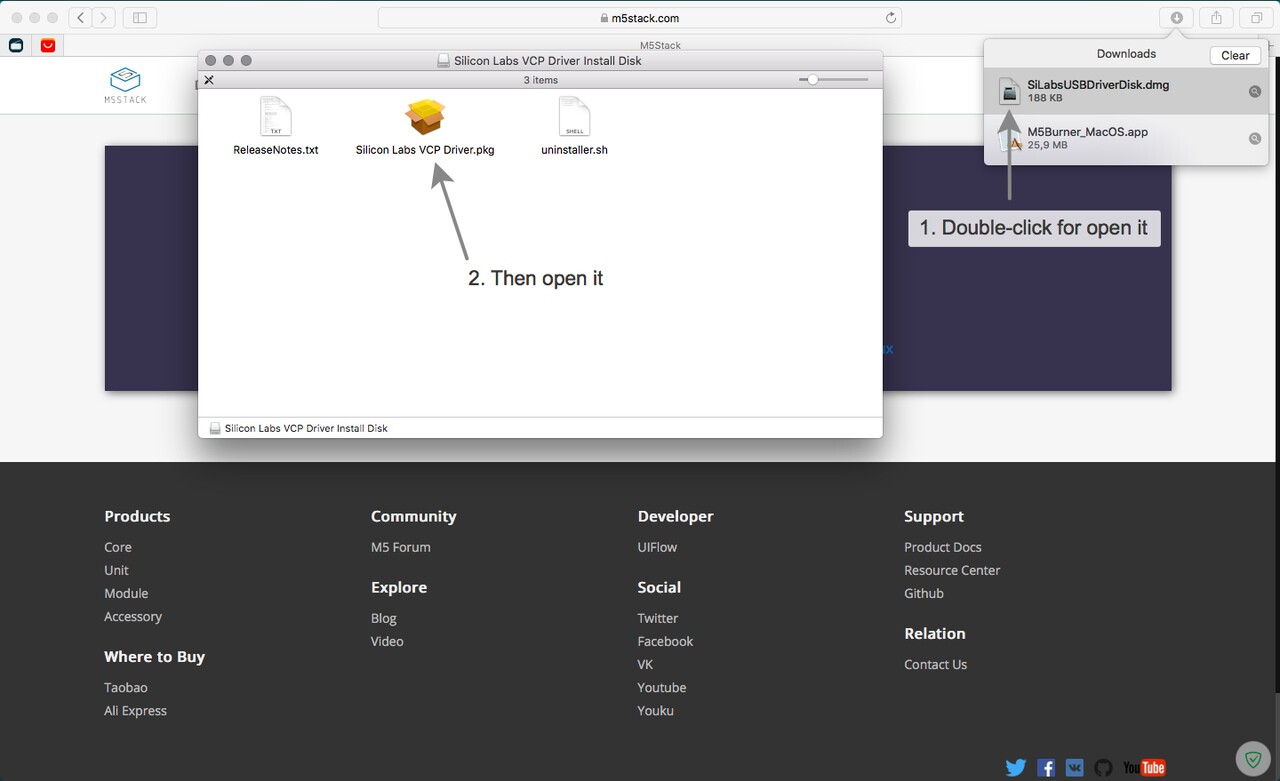
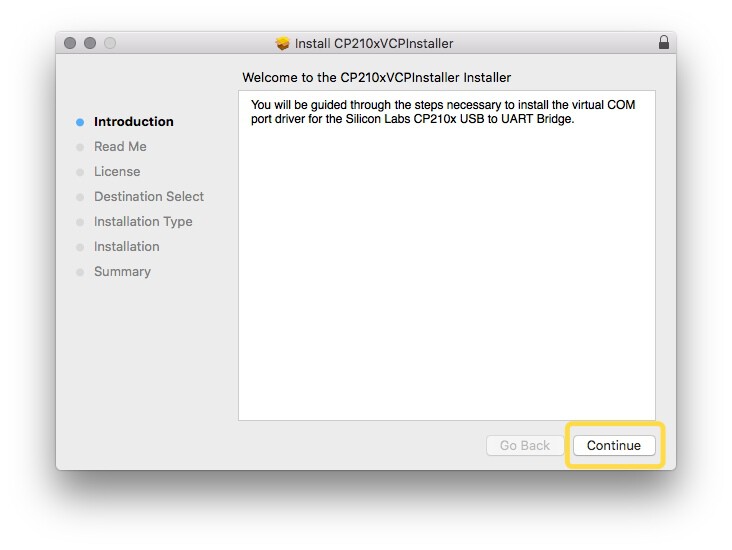
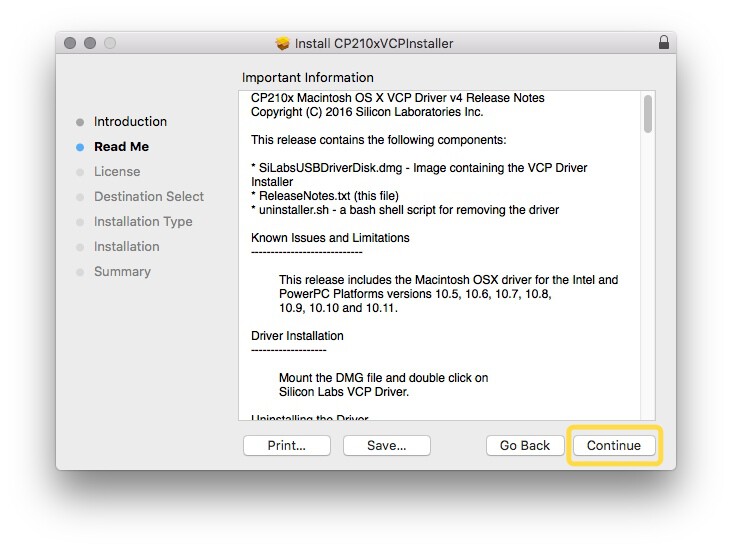
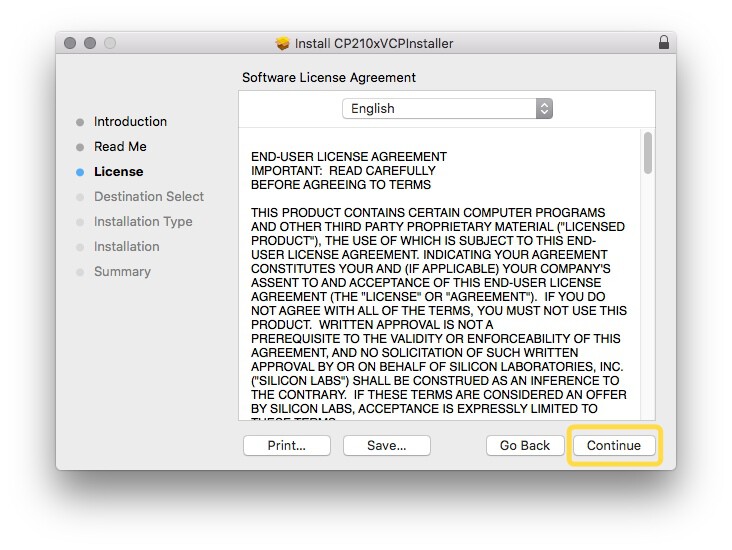
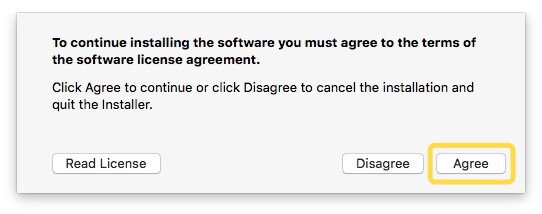
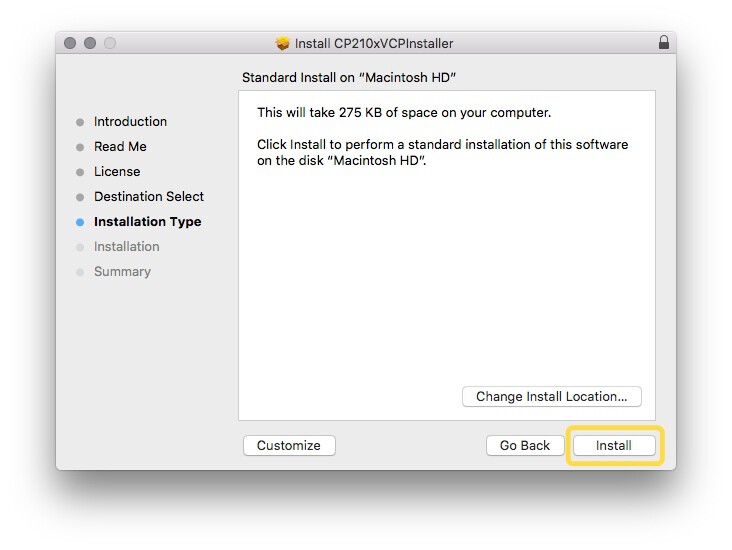
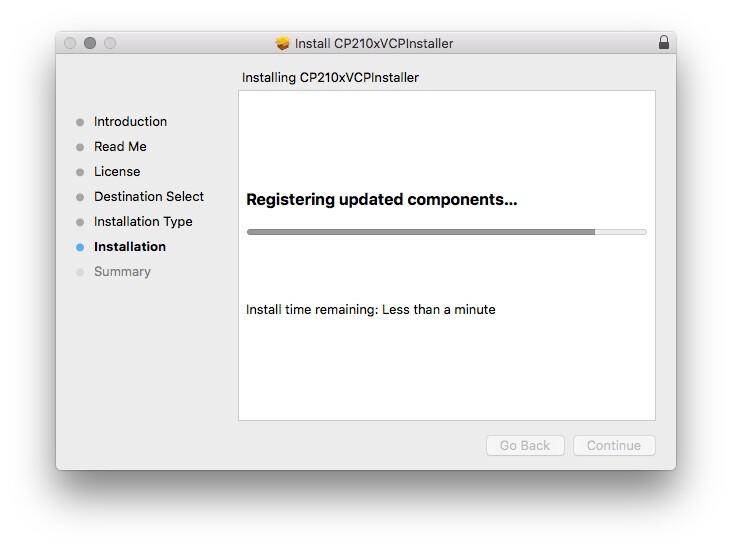
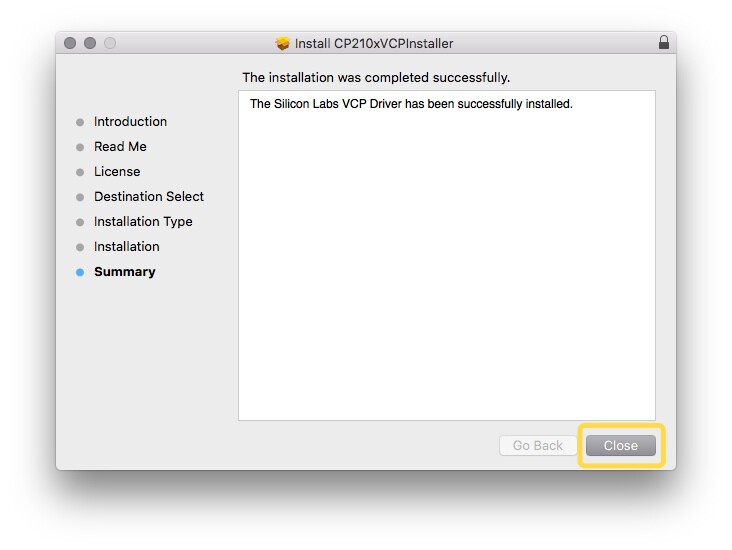
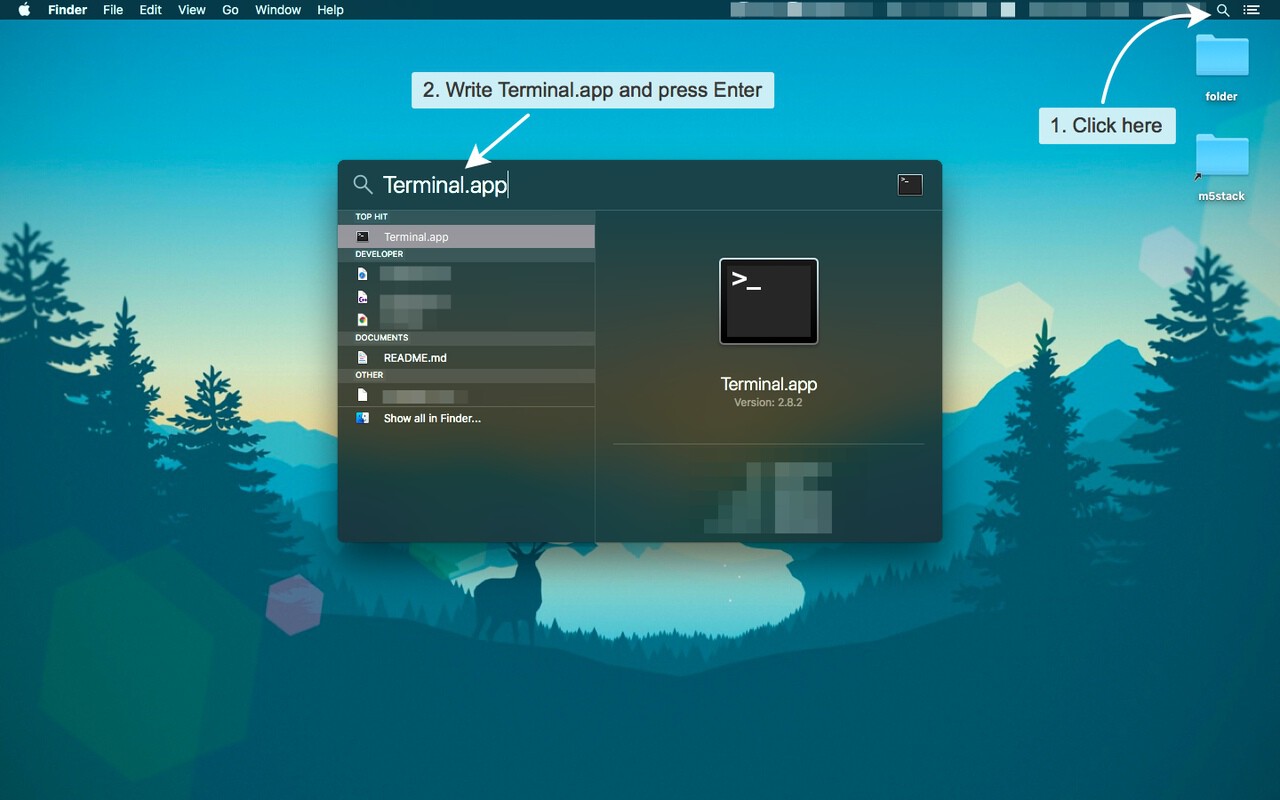
Now, the USB driver has been installed successfully. You must now allow the operating system to run third-party applications. Open the search, then find the Terminal application.app and start it by pressing Enter.
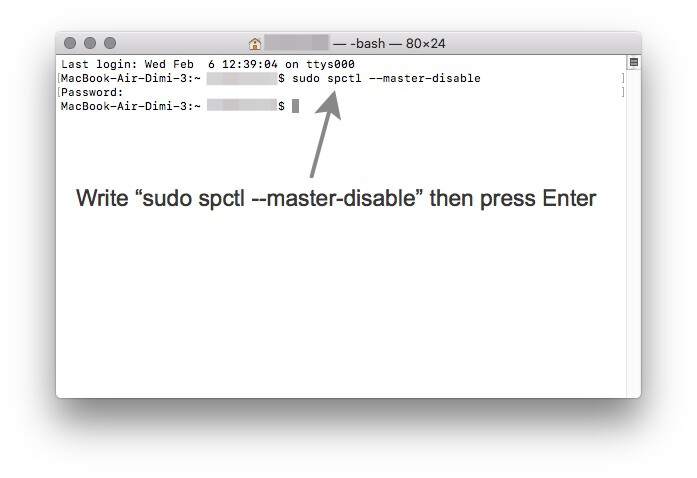
Now write the line below and press Enter.
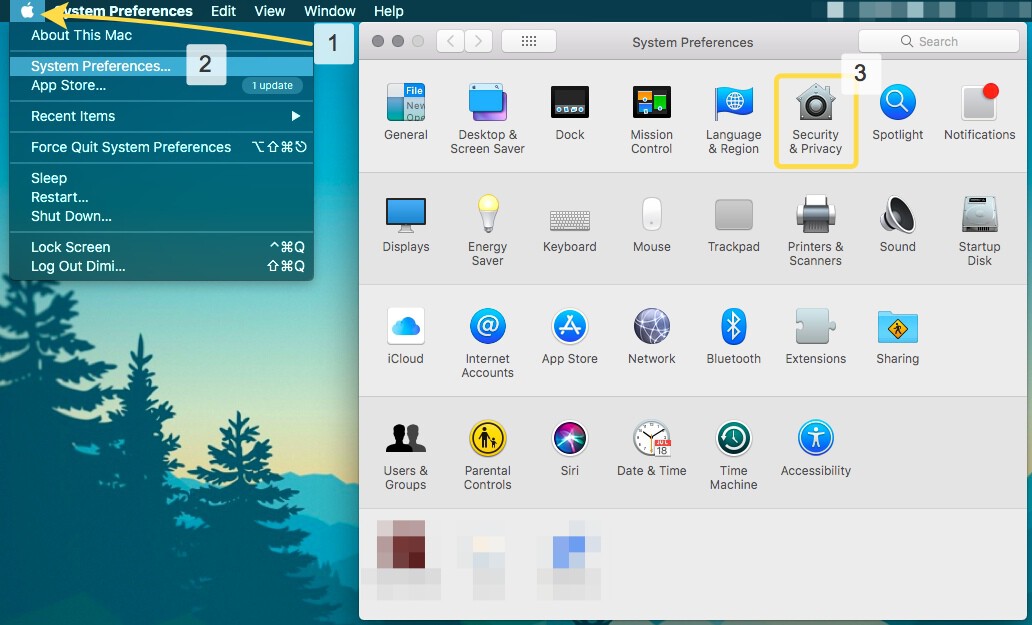
Now, click on the Apple in the upper left corner, then open System Preferences..., then open Security & Privacy.
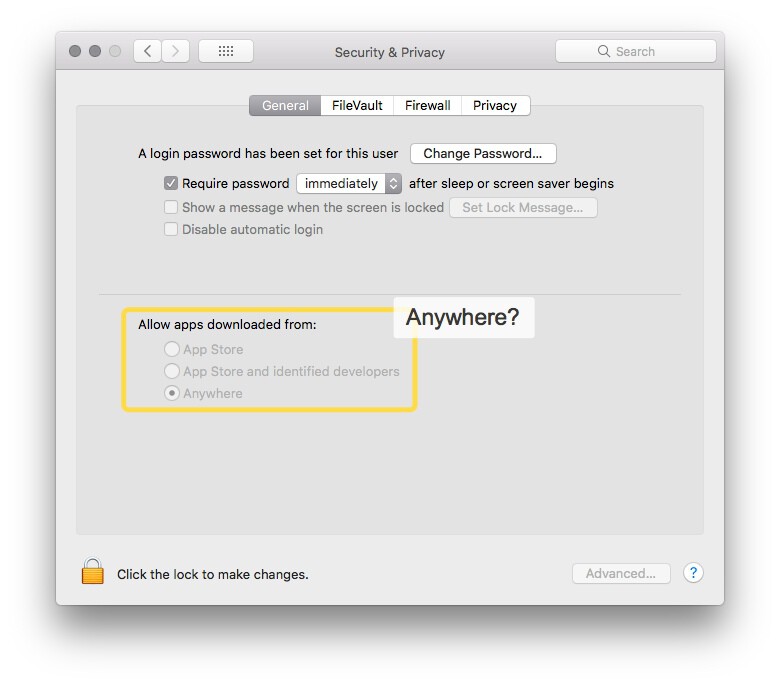
Make sure you have the radio check box set to Anywhere (if not, check it).
2. Open M5Burner
Now go back to the browser to Downloads button and open the file with the Ctrl key pressed.
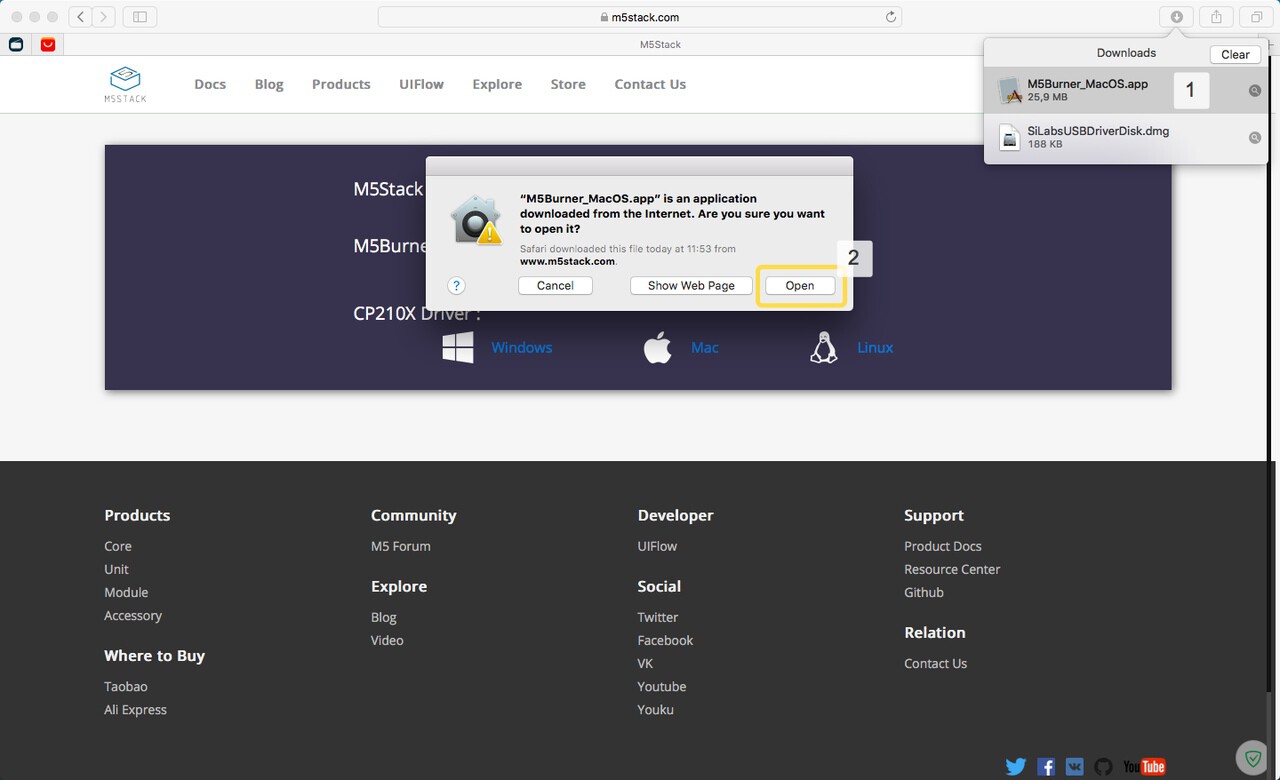
3. Burn the firmware
So, now connect your device to your Mac with a USB cable. Select the corresponding SOFTWARE version (Normally, select the lastest version) and click on the Flash button. At the end of the process, the indicator will be completely painted.
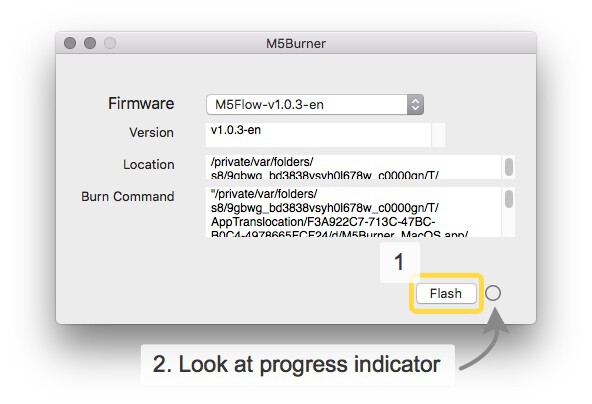
Once the device is flashed - disconnect the cable from the Mac and press the red button (the same power button) on the M5.
Linux
1. Install pip and esptool
Open the terminal, enter the following command according to your system version for installing Python package management tool pip.
- Centos7:
1 | sudo yum install python-pip |
- Ubuntu and Debian:
1 | sudo apt-get install python-pip |
- Arch:
1 | sudo pacman -S --needed python-pip |
After installing pip successfully, enter sudo pip install esptool for installing esptool.

2. Download the last version of M5Burner
Access UIFlow, download the MacOS version installer M5Burner-Flow-For-MacOS, and unzip it.
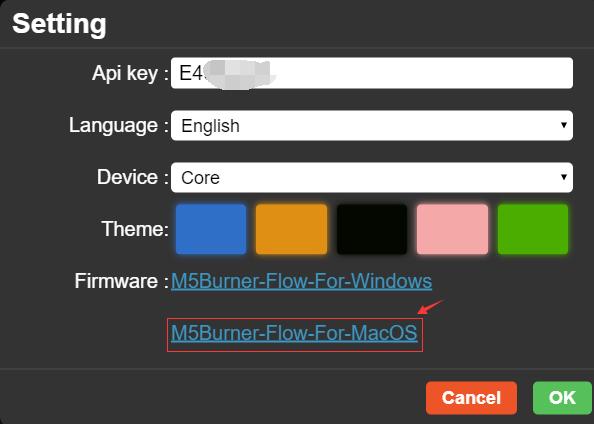
3. Execute
Creat a new folder M5burner, and copy M5Burner_MacOS/M5Burner_MacOS.app/Contents/Resources/firmware/M5Flow/ to ~/M5burner
If you want to bun v1.1.1 version firmware, switch the current directory to the corresponding directory e.g. cd ~/M5burner/M5Flow/v1.1.1-en

Plug the M5Core in, and enter sudo chmod +x *.sh for granting root authority, and run sudo ./flash.sh
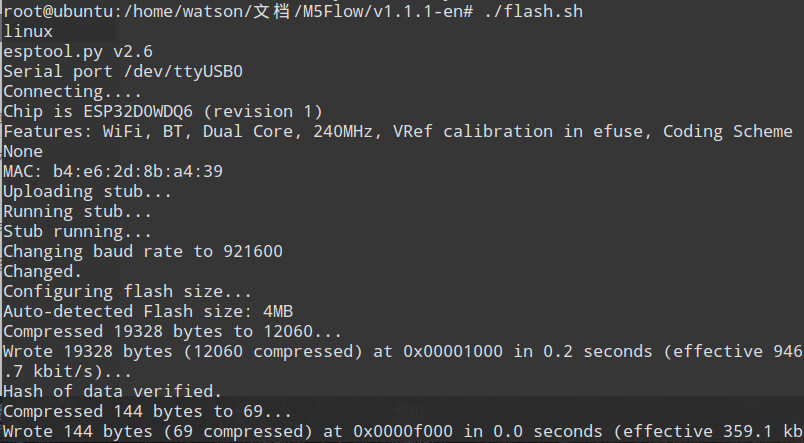
Video Tutorial
Windows